🎬 LipsyncFlow
FFmpeg Options Editing Guide
📚 Managing Your FFmpeg Library
Navigate to
Click the button to create a new ffmpeg processor
Double-click any processor in the grid to open the JSON editor
In the editor, set:
type: "ffmpeg"value: Your ffmpeg filter chain
- No prefix: "hflip" → becomes "-vf hflip" (video filter)
- Video filter: "-vf scale=1920:1080" → used as-is
- Audio filter: "-af volume=2.0" → used as-is (audio filter)
🎯 Using Processors in Your Scripts
For Sequences
- Per Clip Processors - Applied to individual clips
- Joined Video Processors - Applied to the final joined video
For Script Entries
- Per Clip Processors - Applied to individual clips
- Final Frame Processors - Applied to final frames
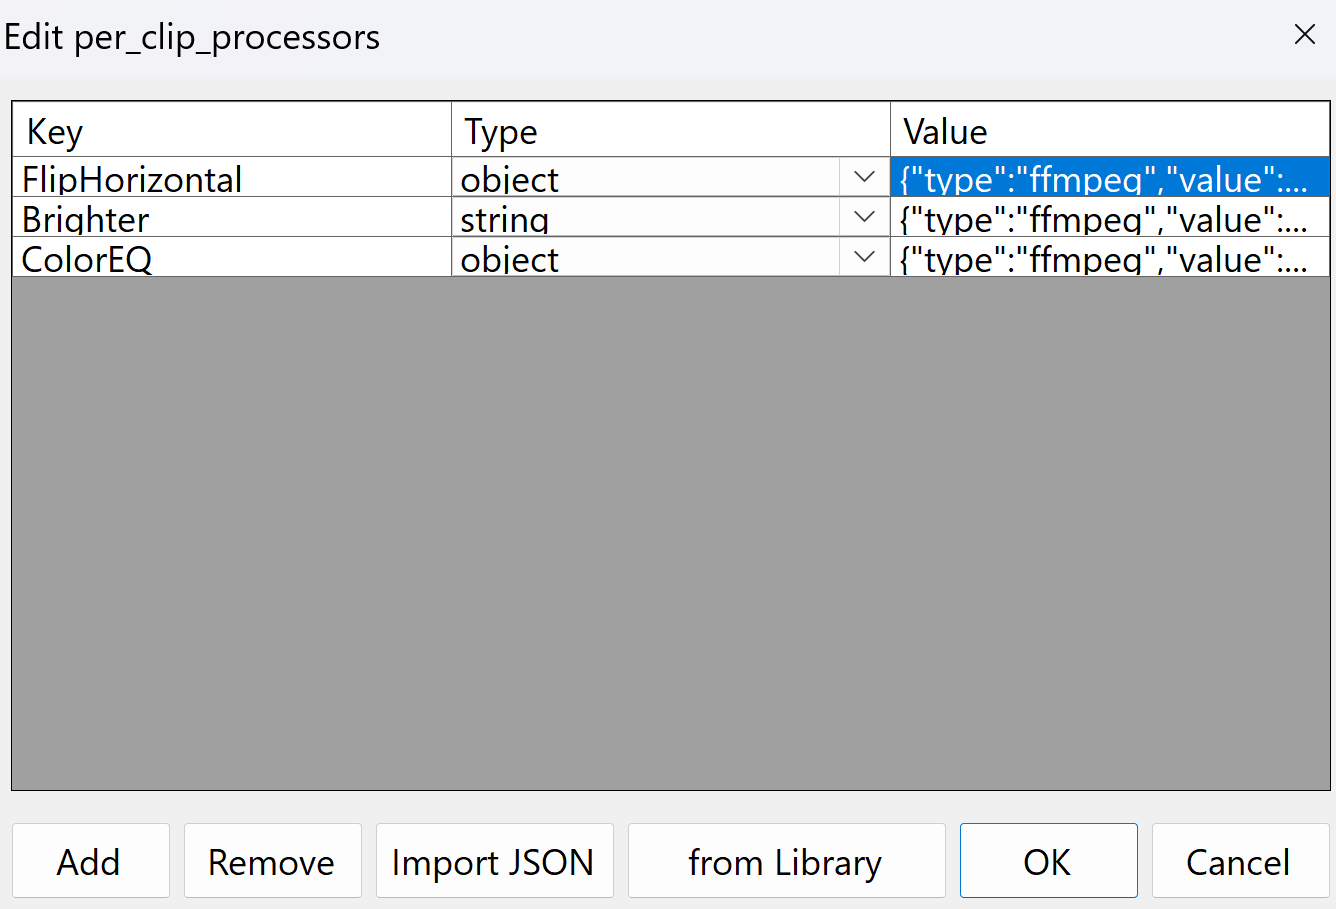
This dialog allows you to manage individual media processors. It displays a table with 'Key', 'Type', and 'Value' columns.
- 'Object' Type Rows (e.g., 'FlipHorizontal', 'ColorEQ'): When the 'Type' is 'object', double-clicking the 'Value' field will open a separate dictionary editor dialog for detailed configuration. This is where you can edit the FFmpeg filter values.
- 'String' Type Rows (e.g., 'Brighter'): When the 'Type' is 'string', the 'Value' field can be directly edited by clicking into it. This is used for simple text-based processor values.
{"type":"ffmpeg","value":...}.
To edit FFmpeg values: Double-click on any 'object' type row's Value field to open the dictionary editor, where you can modify the FFmpeg filter parameters.
Buttons at the bottom include 'Add', 'Remove', 'Import JSON', 'from Library', 'OK', and 'Cancel'.
Import Options
The dialog provides two powerful import options to help you quickly add FFmpeg processors:
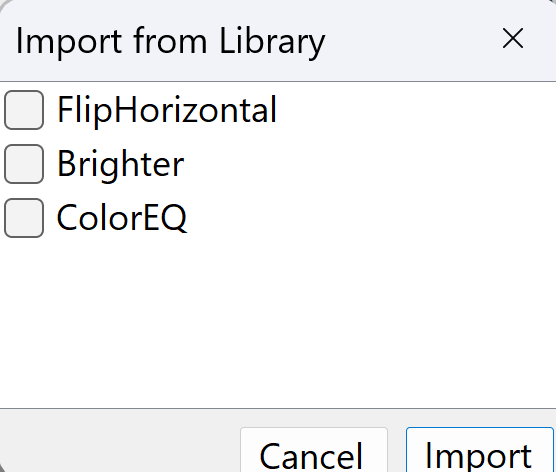
This dialog appears when you click the "from Library" button. It shows all available media processors from your library with checkboxes to select which ones to import.
- Available Processors: Lists all saved processors (e.g., 'FlipHorizontal', 'Brighter', 'ColorEQ') with checkboxes
- Selection: Check the boxes next to the processors you want to import
- Import Button: Click to add the selected processors to your current dialog
- Cancel Button: Close without importing anything
How to Use Import Buttons
- From Clipboard: If you have JSON data copied, the dialog will ask if you want to import from clipboard
- From File: If you click "No" to clipboard, you can browse and select a JSON file
- Use Case: Import processors from other projects, share configurations, or restore from backups
- Select Processors: Check the boxes next to the processors you want to add
- Import Selected: Click "Import" to add them to your current dialog
- Use Case: Quickly reuse your favorite FFmpeg effects across different script entries
📚 Media Processor Library
The Media Processor Library is your central hub for creating, managing, and reusing custom FFmpeg filter configurations. This is where you build your toolkit of FFmpeg effects that can be quickly applied across different projects.
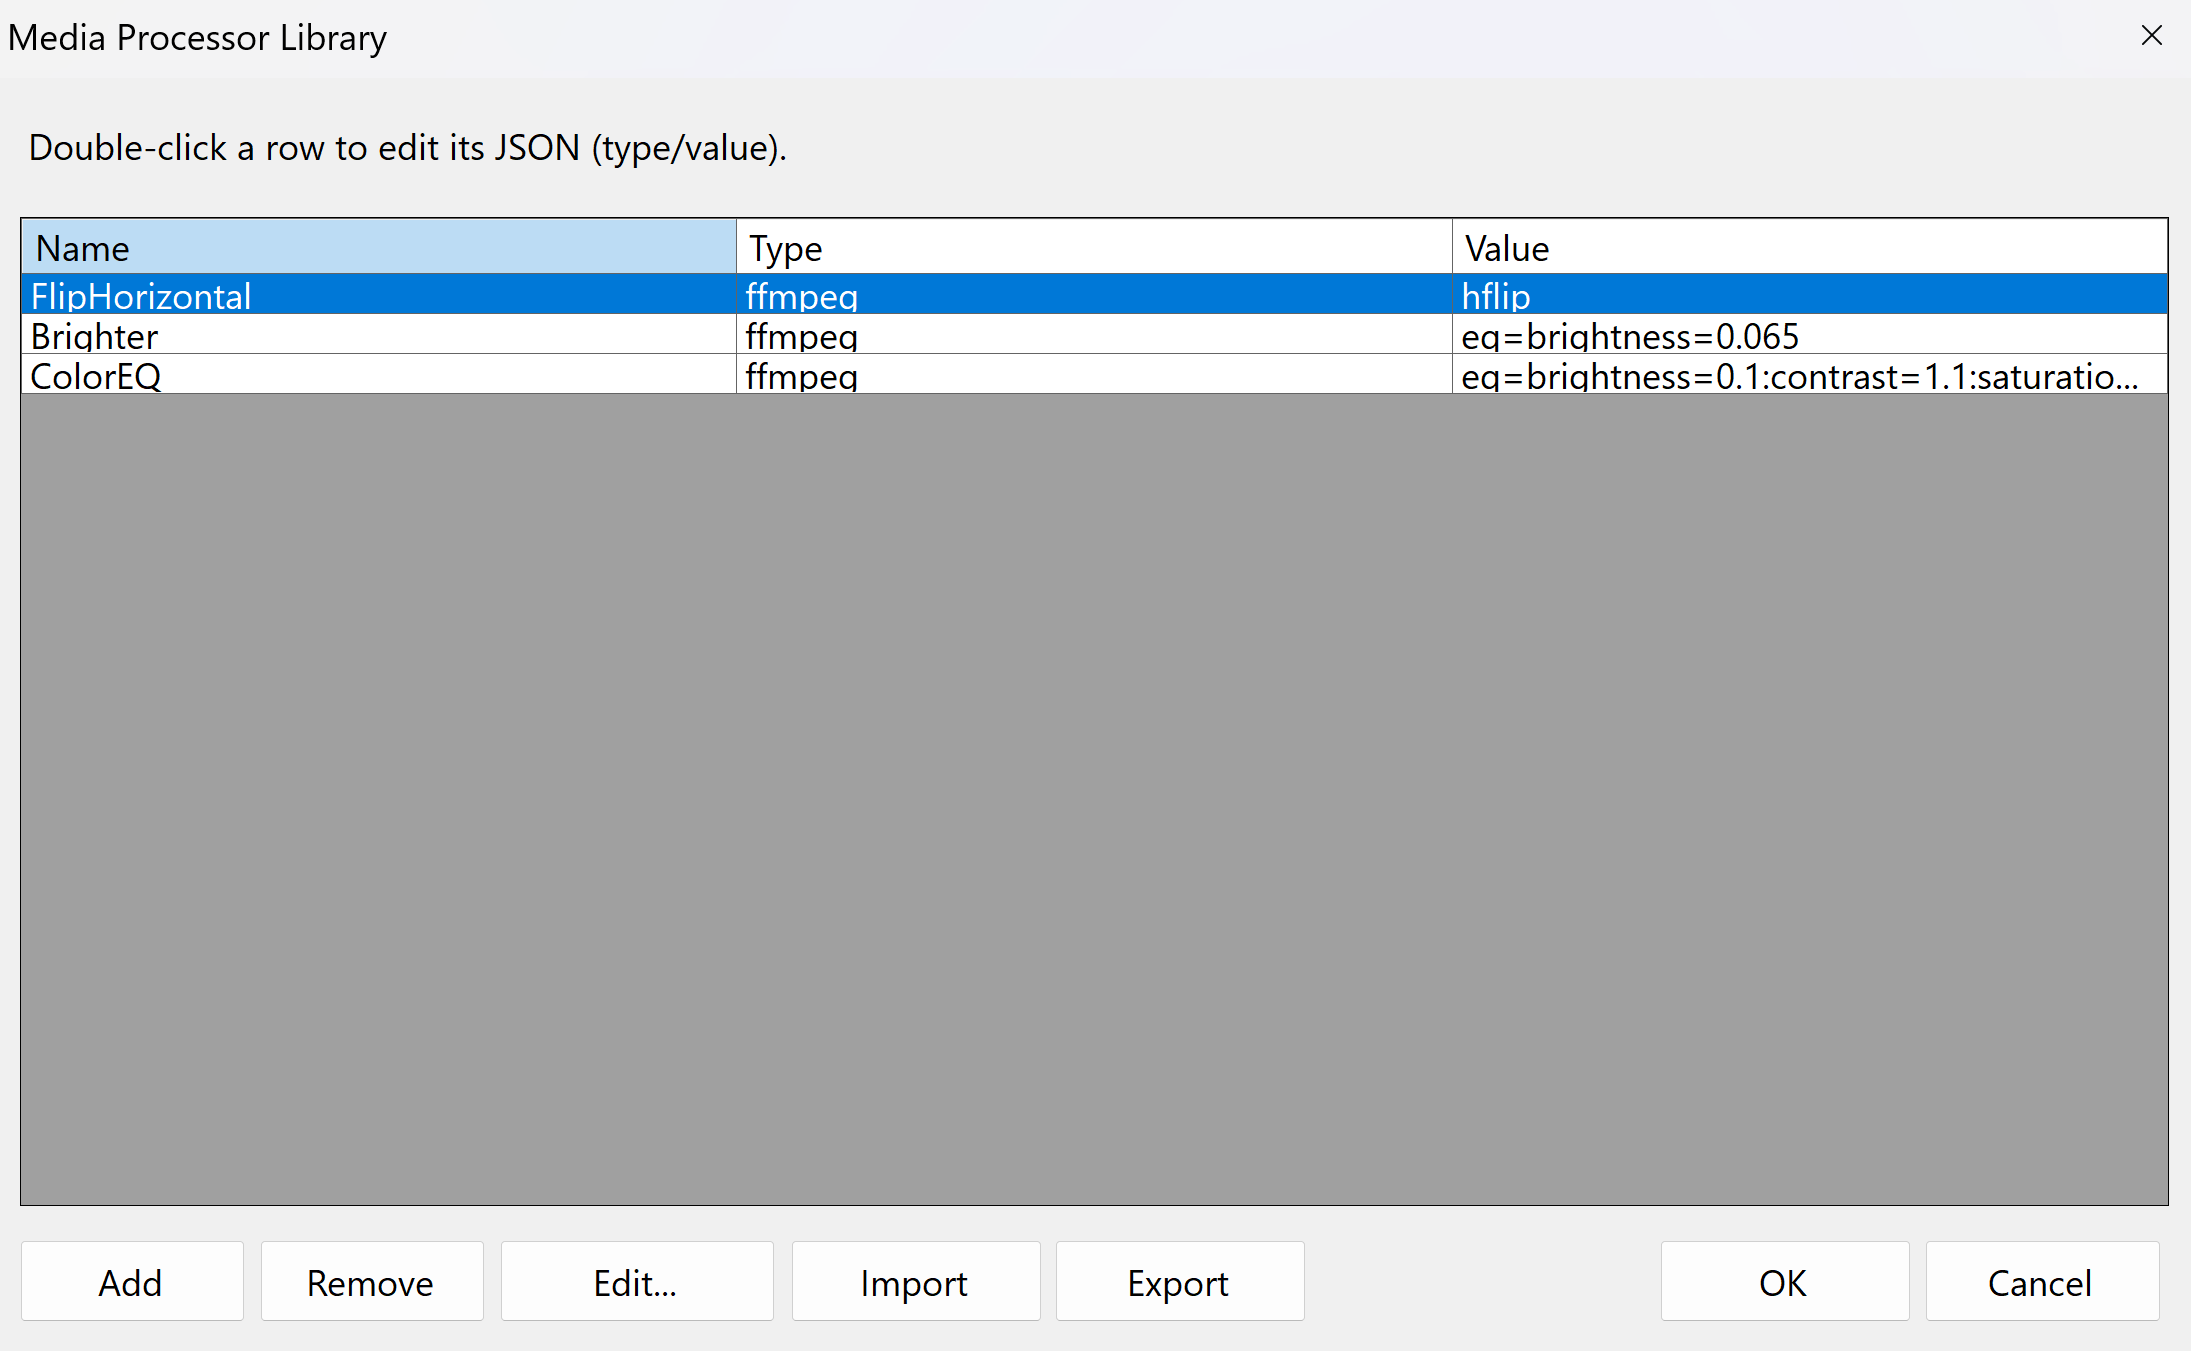
This dialog is your central repository for managing reusable FFmpeg filter definitions. Each row represents a 'Media Processor' with a 'Name', 'Type' (always 'ffmpeg' for these filters), and 'Value' (the FFmpeg filter chain).
- Defining Processors: Use the 'Add', 'Remove', and 'Edit...' buttons to manage your list of processors
- Import/Export: The 'Import' and 'Export' buttons allow you to save and load your entire library of processors as a JSON file, making it easy to share or back up your configurations
- Editing Values: Double-clicking a row or using the 'Edit...' button opens a dictionary editor where you can define the FFmpeg filter 'Value'
- Relationship to 'From Library' Dialog: The processors defined here are the exact items that appear for selection when you click the 'From Library...' button in other dialogs
How to Use the Media Processor Library
- Enter a descriptive name (e.g., "MyCustomSharpen")
- Set the type to "ffmpeg"
- Enter your FFmpeg filter value (e.g., "unsharp=5:5:0.8:3:3:0.4")
- This opens a dictionary editor where you can modify the processor's properties
- Perfect for fine-tuning FFmpeg filter parameters
- Remove: Delete the selected processor
- Import: Load processors from a JSON file
- Export: Save your entire library to a JSON file
Connection to "From Library" Dialog
The Media Processor Library is directly connected to the "From Library" dialog you saw earlier. Here's how they work together:
- Create: Define your FFmpeg processors in the Media Processor Library
- Save: These processors are automatically saved and available across all projects
- Reuse: When editing script entries, click "From Library" to see and select from your saved processors
- Apply: Selected processors are instantly added to your current dialog
🔗 Additional Resources
For more detailed information about FFmpeg filters and commands, check out these helpful resources:
📖 Official FFmpeg Documentation
Comprehensive official documentation covering all FFmpeg features, filters, and command-line options.
Visit FFmpeg Docs →🎬 FFmpeg Filter Documentation
Detailed reference for all available video and audio filters, including examples and parameter descriptions.
View Filter Reference →🎵 Audio Filter Reference
Complete guide to audio processing filters including equalizers, compressors, and effects.
Audio Filters Guide →🎨 Video Filter Reference
Comprehensive list of video filters for scaling, color correction, effects, and transformations.
Video Filters Guide →⚡ FFmpeg Examples
Practical examples and common use cases for video and audio processing with FFmpeg.
View Examples →🔧 FFmpeg Wiki
Community-maintained wiki with tutorials, guides, and troubleshooting information.
Browse Wiki →📋 Dictionary Examples
Here's what the JSON structure looks like for each type of processor:
📚 Library Entry
{
  "name": "NormalizeAudio",
  "type": "ffmpeg",
  "value": "loudnorm"
}
🎬 Sequence Per Clip Processors
{
  "audio_normalize": {
    "type": "ffmpeg",
    "value": "loudnorm"
  },
  "video_scale": {
    "type": "ffmpeg",
    "value": "scale=1920:1080"
  }
}
🎞️ Sequence Joined Video Processors
{
  "final_effects": {
    "type": "ffmpeg",
    "value": "hflip,scale=1280:720"
  },
  "audio_boost": {
    "type": "ffmpeg",
    "value": "-af volume=2.0"
  },
  "video_enhance": {
    "type": "ffmpeg",
    "value": "-vf eq=brightness=0.1:contrast=1.1"
  }
}
📝 Script Entry Per Clip Processors
{
  "clip_enhance": {
    "type": "ffmpeg",
    "value": "unsharp=5:5:0.8:3:3:0.4"
  },
  "color_adjust": {
    "type": "ffmpeg",
    "value": "eq=brightness=0.1:contrast=1.1:saturation=1.0:gamma=1.0"
  }
}
🖼️ Script Entry Final Frame Processors
{
  "frame_watermark": {
    "type": "ffmpeg",
    "value": "overlay=10:10"
  },
  "blur_effect": {
    "type": "ffmpeg",
    "value": "boxblur=5:1"
  }
}
⚡ Quick Reference
Common FFmpeg Values
Video Filters (default -vf):
Horizontal flip:         "hflip"
Scale video:             "scale=1920:1080"
Multiple filters:        "scale=1920:1080,hflip"
Color adjustment:        "eq=brightness=0.1:contrast=1.1:saturation=1.0:gamma=1.0"
Unsharp mask:            "unsharp=5:5:0.8:3:3:0.4"

Audio Filters (-af prefix):
Audio normalization:     "-af loudnorm"
Audio volume boost:      "-af volume=2.0"
Audio equalizer:         "-af equalizer=f=1000:width_type=h:width=200:g=5"
🔧 Advanced Usage
Complex Filter Chains
You can combine multiple ffmpeg filters in a single processor:
{
  "complex_processing": {
    "type": "ffmpeg",
    "value": "scale=1920:1080,hflip,unsharp=5:5:0.8:3:3:0.4 -af loudnorm,volume=1.2"
  },
  "video_audio_combo": {
    "type": "ffmpeg",
    "value": "-vf eq=brightness=0.1:contrast=1.1 -af equalizer=f=1000:g=3"
  }
}
Conditional Processing
Use additional JSON fields for more control:
{
  "conditional_scale": {
    "type": "ffmpeg",
    "value": "scale=1920:1080",
    "condition": "width > 1920",
    "description": "Scale down if video is too wide"
  }
}