🎛️ LipsyncFlow Main Form Guide
Master the main interface for managing LipsyncFlow video generation jobs and accessing core tools
📋 Overview
The LipsyncFlow Main Form serves as the central hub for your video generation workflow. It provides access to the Script Editor, Service Administration, and a powerful Job Queue monitoring system that tracks all your video generation jobs in real-time.
- Script Editor Access: Launch the full-featured script creation and editing interface
- Service Administration: Start and manage the LipsyncFlow video rendering service
- Job Queue Monitoring: Real-time tracking of all video generation jobs
- Automatic Refresh: Jobs update automatically every minute when available
- Interactive Job Management: Click to copy data, double-click to open job folders
🚀 Getting Started
Main Menu Options
File → Script
Opens the LipsyncFlow Script Editor in a new dialog window. This is where you'll create and edit your video generation scripts, manage characters, and configure all the parameters for your AI-generated videos.
File → Run Service Admin
Launches the LipsyncFlow Service Administration interface. This is the control panel for managing the backend AI rendering services that process your scripts and generate the actual videos.
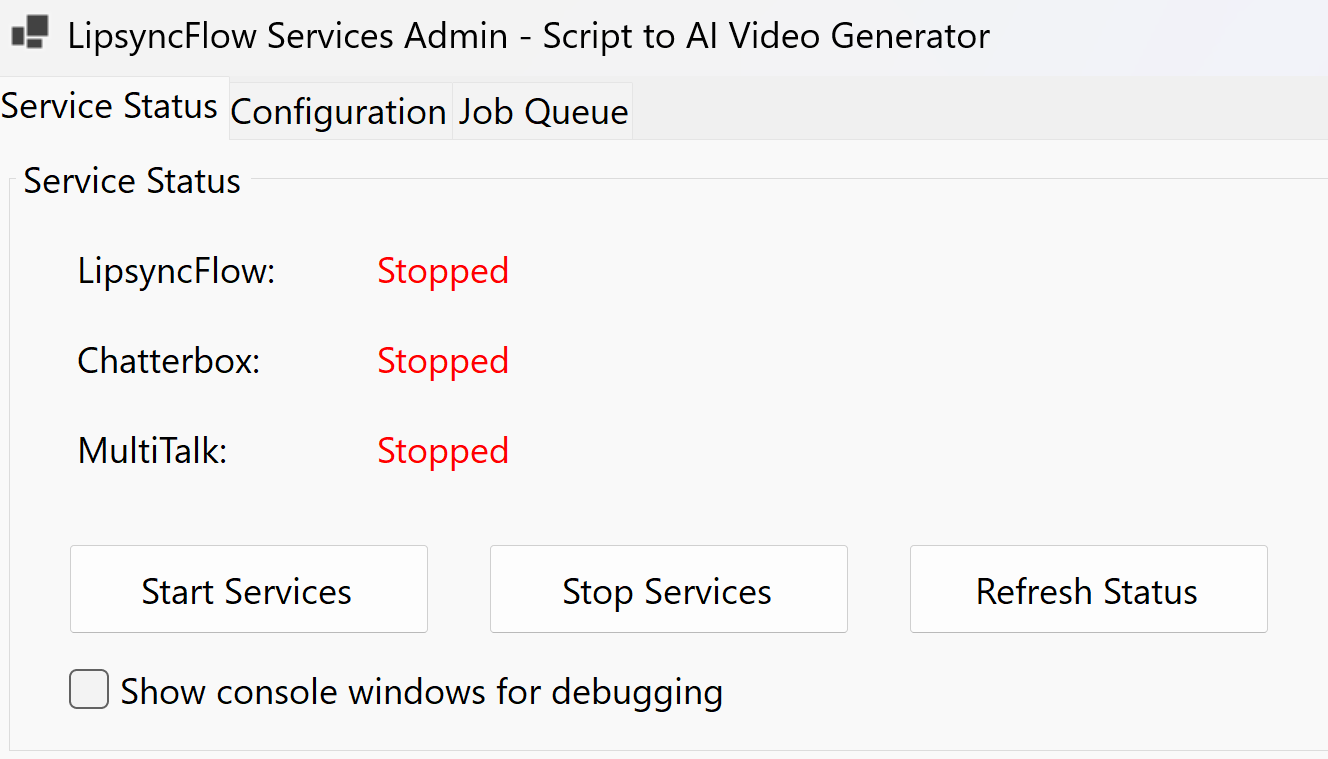
This is the main control panel for managing the AI rendering services. Key features include:
- Service Status Section: Shows the current status of LipsyncFlow, Chatterbox, and MultiTalk services (currently "Stopped" in red)
- Start Services Button: Initiates all necessary AI rendering services to process video generation requests
- Stop Services Button: Halts all running services when you're done with video generation
- Refresh Status Button: Checks the health status endpoint of each service and updates their displayed status
- Show Console Windows Checkbox: Opens separate console windows for each service to view real-time logging and diagnostic information
- Configuration Tab: Edit application settings including the base output path where generated videos are saved
- Job Queue Tab: View the internal job queue managed by the services, showing rendering tasks currently being processed
📊 Job Queue Tab
The Job Queue tab provides real-time monitoring of all your video generation jobs. This tab automatically appears when jobs are detected in the system.
Job Queue Columns
Job ID
Unique identifier for each video generation job. Used for tracking and debugging purposes.
Status
Current processing status of the job (e.g., "processing", "completed", "failed").
Title
Auto-generated title based on the first script entry's character and text content.
Entries
Number of script entries in the job, indicating the complexity of the video.
Duration
Total calculated duration of all script entries combined.
Created
Timestamp when the job was created and submitted to the service.
Output Path
File path where the completed video will be saved (filename only in display).
Interactive Features
Single Click - Copy Data
Click any cell in the job queue to automatically copy its content to the clipboard. The clicked text will also appear in the title label above the list.
Double Click - Open Job Folder
Double-click any job row to open the job's working directory in Windows Explorer. This gives you direct access to all job files, logs, and output videos.
Right-Click Context Menu
Right-click anywhere in the job queue to access additional options:
- Refresh Jobs (F5): Manually refresh the job list
- Copy Cell Text: Copy the content of the clicked cell
⌨️ Keyboard Shortcuts
🔄 Automatic Features
Auto-Refresh System
Timer-Based Updates
The job queue automatically refreshes every 60 seconds when jobs are available. This ensures you always see the latest job status without manual intervention.
Smart Tab Visibility
The Job Queue tab only appears when jobs are detected in the system. If no jobs are found, the tab remains hidden to keep the interface clean.
Loading Indicators
Progress Feedback
When refreshing jobs, you'll see:
- A loading status message
- A progress bar with marquee animation
- Disabled refresh button to prevent multiple requests
🔧 Configuration Requirements
Shared Paths Configuration
shared_paths.json
The main form looks for a configuration file in several locations to determine where job data is stored:
• LipsyncFlow subdirectory: LipsyncFlow/shared_paths.json
• Parent directory: ../shared_paths.json
• Parent/LipsyncFlow: ../LipsyncFlow/shared_paths.json
Required Configuration
The configuration file must contain a base_directory field that points to the root directory where LipsyncFlow stores its data.
🎯 Best Practices
Workflow Recommendations
1. Start the Service First
Always launch the Service Admin before creating scripts. This ensures the backend is ready to process your video generation requests.
2. Monitor Job Progress
Use the Job Queue tab to track your video generation progress. The automatic refresh keeps you informed of status changes without manual intervention.
3. Use Interactive Features
Take advantage of the click-to-copy and double-click-to-open features for efficient job management and troubleshooting.
4. Check Job Folders
When jobs complete or fail, double-click to open the job folder and examine logs, intermediate files, and final outputs.